

Rips and Tears Aren’t the End of the World
If you don’t know how to patch a bounce house, your heart might stop in your chest the first time you see damage. A hole, a rip, a tear … damage to your bounce house can leave you feeling dazed, like a cartoon character getting bonked on the head. Though instead of little animated birdies circling your cranium, it’s dollar signs.
But here’s the good news: Damage to your bounce house isn’t usually as catastrophic as it seems at first glance. In fact, once you learn how to patch a bounce house—and when you realize just how easy it is to do a bounce house repair—you might even chuckle over how worried you were.
Repairing a bounce house is actually quite easy and requires minimal DIY know-how. Well, depending on how professional you want that repair to be, anyway.
How to Patch a Bounce House: Three Simple Options
Inflatable repair looks like a headache, but it’s actually quite easy. All you need is some inflatable repair supplies, steady hands, and a bit of patience. Oh, and a pair of scissors, too!
Option 1: The Field Repair
If you happen to catch the damage while the bounce house is in the field, you can use TPU tape to make a quick and easy repair. Simply clean the affected area with alcohol, apply the tape to the damaged spot, and then use a seam roller to smooth it out. Try your best to avoid bubbles, sort of like when you’re putting a new screen protector on your phone.
If you’re using Tear Aid products, be sure you’re getting the right type for the material you’re using. For most bounce house repairs, you’ll need vinyl Tear Aid.
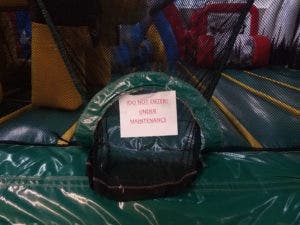
Note: This option will not work for stress bearing areas. The tape will separate if under real stress. This is only meant to be used as a temporary in-field solution
Option 2: The Quick & Permanent Bounce House Patch
If you have a little more spare time and a clean work environment, this option is a more permanent fix for your unsightly bounce house damage. For this, we’re going to need some inflatable vinyl, if not a whole inflatable repair kit. And hey, remember those scissors we mentioned earlier? Those will be helpful now, too.
Cut out a piece of vinyl large enough to cover the affected area. We suggest using your scissors to make the shape round, if possible. Next, use a non-acetone cleaner (rubbing alcohol is okay to use) and clean both the affected area and the repair vinyl you’re using. Now just lay the patch over the area and apply some HH66 or SX69 vinyl cement. Let it dry, and voila! A permanent commercial grade bounce house repair that only took you a few minutes.
Option 3: The Difficult (and Best!) Repair
For a truly permanent, professional repair, you’re going to need to put some real labor into it. And that’s going to require the use of a Speedy Stitcher sewing awl. Sadly, we can’t explain how to do a professional stitch in the context of this short article; that’s something we’ll revisit in the future and talk about at greater length. But here’s a great video that explains how to use a Speedy Stitcher in detail.
Vinyl Repair Kits and Patch Kits are Just a Few Clicks Away
Commercial bounce houses and inflatable water slides experience not only accidental damage, but regular wear and tear over time. From torn seams to all-out punctures, work in the party rental field will eventually lead to your making both common repairs and larger ones.
We strongly recommend having a few vinyl repair kits on hand, as well as Tear Air, liquid tape, vinyl cement, and spare rolls of vinyl. And always remember that repair issues left unattended can and invariably will morph into repair nightmares. It’s always best to get them sorted quickly.
Need advice on what vinyl repair options will work best for your repairs? Call our experts at 1-716-832-8368 and we’ll be happy to help you find the right repair products for your needs!